Even though, 2008's Fashion God Henry Holland beat me to it in the March UK issue of Vogue, I'm gonna post my article on tie-dye anyway.
I know it's 2008 but the 60's are upon us. Hippy chic is back, so you're going want to get a move on and buy that tanned leather fringe bag, those John Lennon-esque tinted frames that Mary-Kate is sporting now and some tie-dyed gear.
I've been a big fan of the 60's for as long as I can remember. My mother had to sit and have a serious chat with me about putting up the peace sign in every photo I took. I would sit inches away from the TV screen when "Dancing Queen" came on, sadly mesmerized, almost to tears at the beauty of it all. I only started putting aside my bell-bottomed jeans near the end of the re-introduction to the skinny jean. (I recall staring down at them in a magazine, retorting "I am never wearing those! How am I going to be in style now? GREAT!"). For the record, I wore them.
As for tie-dye, having discarded my collection of it back in High School in an attempt to 'get fashionable', I am now reduced to one pair of baby blue tie-dyed Victoria Secret underwear bought last year. The only thing from the era it seems I haven't gotten rid of is my knowledge of DIY Tie-Dye. You'll never guess where I learnt it. Sesame Street. Yes, that's right. They did a feature on it being easily perfected in a Third World country backyard. I instantly sent my mum out to the craft store for the things I would need. In fact, I did a similar pair of underwear to the VS ones in my first batch, at aged 12.
Having said all that, I think you will find that this recipe is tried and true. Here's what you're going to need:
Your dye, of course. Whatever colours you want.
Lots of rubber bands (the tie in tie-dying)
A large pot or bucket (preferably one that you don't want to get stained)
An old spoon or something to stir the dyed items with
Rubber Gloves (so as not to get your hands stained)
Lots and lots of salt (this keeps the colour darker, and therefore, more vibrant)
A specimen, like a t-shirt (or anything! A pillowcase, socks, you husband's briefs, as long as 60% cotton at the very least)
You might also want to newspaper and garbage bag your tie-dying space so as not to dirty your chic mosaic tiles or shag carpet.
METHOD
1. If you have just bought the item you are tie-dying, you need to wash it to remove any sizing or chemicals from the manufacturer, as they may not react well with the dye.
2. Lay your item out flat first, then fold and tie it anyway you want with the rubber bands. The more rubber bands you use, the more tie dye patterning you get. There is no right or wrong way to do this, as all patterns vary according to where the rubber band cuts into the fabric.
3. Prepare your dye in accordance to its specific instructions, and empty into your pot/bucket of hot water, with a free pour of salt.
4. Then let the dying begin! If you plan to use two colours instead of one, it is better to start with the lighter colour. Rinse or wait between colours as directed by the manufacturer. However, each brand of dye is different and has different dying and rinsing instructions. So follow them carefully!
5. When finished, make sure to thoroughly wash and soap all utensils used.
6. Most importantly, be careful how you wash your new tie-dyed items. Always wash in cold water. They tend to bleed a little in the first few washes so take care not to wash with any unlike colours.
HERE ARE SOME PATTERNS YOU CAN TRY:
1. Spiral: Determine where you want the center of your spiral, and hold the fabric in that spot. Twist the fabric into a point, adding ties along the length of the “cone.”
2. “V” Pattern: Fold the fabric in half and starting at one corner, fold the fabric in even segments back and forth accordion style. Add fasteners as you go.
3. Concentric circles: Same as the spiral, but don’t twist the fabric.
4. Stripes: Roll the fabric into a tube, and fasten ties along the length.


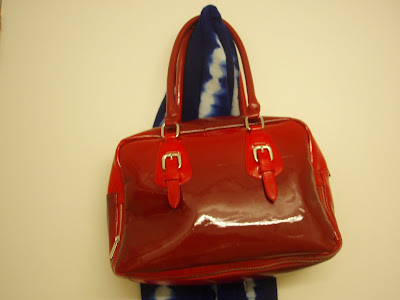
 Here's my Topshop scarf and my very slightly gradated red bag bought at a Chinese Market in Abu Dhabi.
.


1 comment:
Mmmm, interesting...maybe I will try, eventhough i am the worst DIYer in the universe!
Post a Comment